Tuesday, November 29, 2016
Hot and Sour Chicken Soup
Hot and Sour Chicken Soup recipe with step by step photo - Winter is here and we really look forward to having hot bowl of soups in this season, even though we are not much of soup lovers. Soups are so comforting and warming in cold. Hot and Sour Soup is a popular Chinese soup loaded with veggies and usually chicken. I made this soup with chicken and some veggies.
In this hot and sour soup the hot element comes from ingredients like chilies and black pepper. So either red chili paste or green chili sauce is added. The sour element in the soup comes from vinegar.
Try this healthy and flavorful soup this winter. It's simply delicious.
In this hot and sour soup the hot element comes from ingredients like chilies and black pepper. So either red chili paste or green chili sauce is added. The sour element in the soup comes from vinegar.
Try this healthy and flavorful soup this winter. It's simply delicious.
Preparation Time:
Cooking Time:
Serves: 4
Author: Jyoti Singh
Ingredients:
- Chicken-1/2 kg
- Carrot – 1/2 cup shredded
- Cabbage – 1/2 cup shredded
- Onion (chopped) – 1 small
- Green chillies (chopped) - 2
- Ginger (finely chopped) – 1 tsp
- Garlic - 1 tsp
- Egg - 1
- Tomato Ketchup – 1 tbsp
- Soy Sauce – 1 tbsp or to taste
- Vinegar – 1 tsp
- Red Chilli Paste – 1 tsp
- Butter - 1 tbsp
- Salt - to taste
- Sugar - 1 tsp
- Pepper powder - 1/2 tsp
- Cornflour-1 tbsp mixed with some water
- Butter - 1 tbsp
- Cilantro (chopped) – as needed
Method:
1. Take some water in a pressure cooker, Add the chicken and little bit of salt and let the cooker give 2-3 vessel. Turn off the heat and allow it to cool down. Remove it and chop it finely and set aside.
2. Now drain the stock through a fine sieve and take it in a bowl. Add red chilli paste, soy sauce, vinegar, tomato ketchup in this stock and mix well. Set it aside.
3. In a pan melt butter. Add ginger, garlic, green chili and fry for 30 seconds.
4. Add onion, carrot and cabbage and stir fry for 5 mins.
5. Add salt, pepper powder and sugar and mix well.
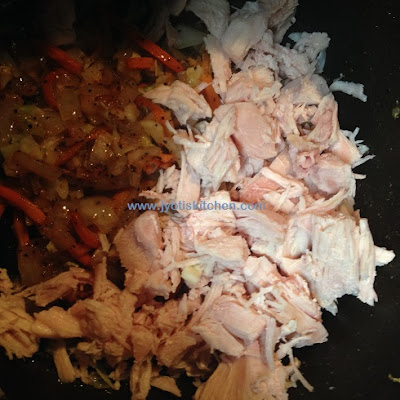
6. Now add the chicken pieces and fry for 5 to 7 minutes.
7. Pour the chicken stock over the veggies and mix well. Simmer for 10 mins on medium heat.
8. Take 1 tbsp corn flour in a bowl, add some water into it and make paste/slurry. Add the corn flour slurry slowly in this and keep mixing until the soup thickens.
9. Beat one egg in a bowl. Drizzle one beaten egg in soup and mix well. Turn off the heat immediately.
10. Garnish with fresh cilantro and mix well.
11. Serve hot.
Hot and Sour Chicken Soup recipe with step by step photo:
1. Take some water in a pressure cooker, Add the chicken and little bit of salt and let the cooker give 2-3 vessel. Turn off the heat and allow it to cool down. Remove it and chop it finely and set aside.
2. Now drain the stock through a fine sieve and take it in a bowl. Add red chilli paste, soy sauce, vinegar, tomato ketchup in this stock and mix well. Set it aside.
3. In a pan melt butter.
4. Add ginger, garlic, green chili and fry for 30 seconds.
5. Add onion.
6. Add carrot and cabbage and stir fry for 5 mins.
7. Add salt.
8. Add pepper powder.
9. Add sugar and mix well.
10. Now add the chicken pieces and fry for 5 to 7 minutes.
11. Pour the chicken stock over the veggies and mix well. Simmer for 10 mins on medium heat.
12. Take 1 tbsp corn flour in a bowl, add some water into it and make paste/slurry.13. Add the corn flour slurry slowly in this and keep mixing until the soup thickens.
14. Beat one egg in a bowl.
15. Drizzle one beaten egg in soup and mix well. Turn off the heat immediately.
16. Garnish with fresh cilantro and mix well.
17. Serve hot.
Popular Tag: Appetizer-Starter, Chicken, Soup
Thursday, November 24, 2016
Moong Dal Kachori/Khasta kachori
Moong Dal Kachori/Khasta kachori Recipe - Moong dal kachori is a popular north indian spicy snack for breakfast and evening snacks. Khasta kachori is a delicious, spicy, fried puffed pastry, filled with spicy moong dal mixture and then deep fried. Kachori is flakey from outside and hollow inside. Moong Dal Kachori can be kept fresh and stored in an air-tight containers for 2 to 3 days. Kachori can be served with dum aloo, curd, green chutney or tamarind chutney. Khasta kachori is one of the dish you can eat for any meal.
Preparation Time:
Cooking Time:
Serves: 4
Author: Jyoti Singh
Ingredients:
For Dough
- All Purpose flour (plain flour or maida) - 1 cup
- Salt - to taste
- Ghee - 2 tbsp
- Water - as needed for dough
For Filling
- Yellow moong dal - 1/4 cup
- Fennel seeds (coarsely grounded) - 1 tsp
- Coriander seeds - 1tsp
- Red chili flakes - 1 tsp
- Ginger (grated) - 1 tsp
- Mango powder (amchoor) - 1/2 tsp
- Asafetida (hing) - a pinch
- Salt - to taste
- Oil - 1 tbsp
- Water - 2 tbsp
- Oil - to deep fry
Method:
To make Dough:
1. In a big bowl mix the flour, salt and ghee.
2. Add water slowly, mixing with your fingers knead the dough.
3. Dough should be soft.
4. Cover the dough and let it set aside for at least fifteen minutes.
To make Filling:
1. Grind the dry moong dal almost to a powder.
2. In a frying pan and heat 1 tbsp oil and roast ground dal over medium heat for about two to three minutes or until dal changes color slightly. Stir continuously.
3. Add all the spices and mix well. Turn off the heat. Let the mixture cool off.
4. Add two tablespoons of warm water and mix it well. Let it set aside for ten minutes.
To make the Kachori:
1. Take the dough and knead it for minute. Divide the dough in twelve equal parts.
2. Take one part of the dough and flatten it by pressing in the middle. Place a little stuffing in the centre of the circle.
3. Bring together all the sides in the center and seal tightly so that stuffing does not come out.
4. Repeat the same process for remaining dough.
5. Let the filled ball sit for three to four minutes before rolling.
6. Roll the Kachori; slowly flatten them into about three inches in diameter.
7. Heat the oil in frying pan over medium heat frying pan should have about one inch of oil. To check if oil is ready put a little piece of dough in the oil. Dough should sizzle, and come up very slow.
8. Fry them on medium-low heat. After they start to puff, slowly turn them over. Fry until golden-brown on both sides.
9. Serve hot with with dum aloo, curd, green chutney or tamarind chutney.
Wednesday, November 9, 2016
Namak Pare - Crispy salted crackers
Namak Pare Recipe with step by step photo - Namak Pare is a Indian snack. Namak Pare is a traditional Savory Treat for the Festivals. Namak Pare is usually made during occasions such as Diwali, Holi, Dushera in north India. I made the Namak Pare for Diwali. There are many snack recipes that are made for Diwali and this is one among them. They are tasty crunchy and flaky snack.
The ingredients that go into making Namak Pare are so common and are actually very few ingredients. Namak Pare are basically made using maida usually called as all purpose flour and into it is also added semolina(sooji) which would give the snack dish a slight crispy flavor. I have added whole wheat flour in it to make this healthy. Namak Pare are made with same kind of dough as Mathri, but much easier and quicker to make than Mathri. This recipe does not require a lot of time and can be made easily.
This crunchy snack is great for tea time snack and can be stored in airtight container for a week or longer.
Preparation Time:
Cooking Time:
Serves: 4
Author: Jyoti Singh
Ingredients:
- All purpose flour (Maida) - 1/2 cup
- Whole wheat flour - 1/2 cup
- Semolina (sooji) - 1/2 cup
- Oil - 3 tbsp + for deep fry
- Carom seeds (ajwaiin) - 1 tsp
- Kalonji seeds - 1 tsp
- Salt - to taste
- Water - as needed to make the dough
Method:
For making the dough:
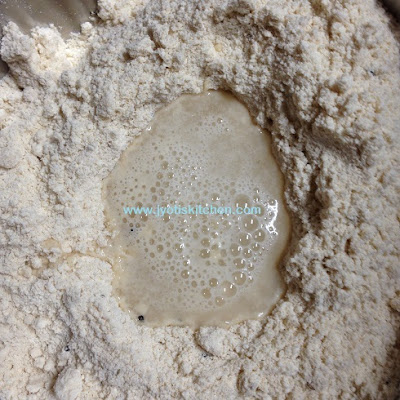
1. In a bowl place all purpose flour, wheat flour and semolina (sooji), carom seeds, kalonji, salt, and oil, mix them together.
2. Once the flour and oil mix well, add a little water at a time and mix it with flour in a rotating motion from the center of the bowl to outward until it form a dough and it cleans the sides of the bowl, knead it for few minutes.
3. Once the dough become soft cover it with a damp towel and let it rest for 15 minutes.
For making the Namak Pare:
1. Once the dough is ready knead the dough for few minutes to make it smooth then divide it in to 3-4 equal parts.
2. Take one part of dough at a time and roll in between your palm and make a ball then press it with your palms and make it flat and place it on the rolling board.
3. With the rolling pin roll the ball of dough firmly into a circle and thickness of salted crackers.
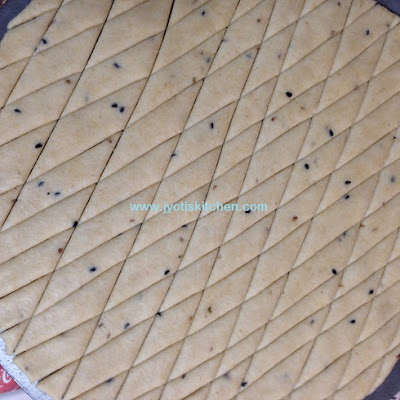
4. Take a knife and make the cuts in rolled dough, either diamond shape or square shapes. You can cut the pares in your desire shape.
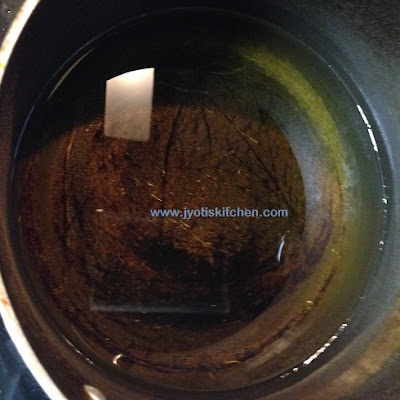
5. Heat oil in a frying pan or kadhai on medium heat until oil become hot.
6. To check if the oil is ready, drop a small ball of dough in the hot oil, if the dough starts sizzling and come up slowly it means it is the right heat but if it becomes too dark quickly it means oil is too hot, turn the heat down.
7. Take a knife and slide under the pares to loosen them, then pick some of the pare and very gently slip in into hot oil, with a fork separate them so that they do not stick together, then immediately with the help of pierced spatula start flickering hot oil over the top of the pare. After few minutes flip the pares to other side and fry. Keep the heat down and keep flipping the pares for 7 to 8 minutes or until pares become golden brown on both the sides.
8. Make sure to place just enough namak pare so you can turn them over easily when frying.
9. Once both side become golden brown lift the pares with the spatula and shake all the oil out, take them out from the hot oil and place them on a plate over paper towel so that all the extra oil absorbed by the towel.
10. Turn the heat down and drop another batch of pares. Repeat the process until all the pares are fried.
Namak Pare Recipe with step by step photo:
1. In a bowl place all purpose flour, wheat flour and semolina (sooji), carom seeds, kalonji, salt, and oil, mix them together.
3. Once the dough become soft cover it with a damp towel and let it rest for 15 minutes.
5. With the rolling pin roll the ball of dough firmly into a circle and thickness of salted crackers.
6. Take a knife and make the cuts in rolled dough, either diamond shape or square shapes. You can cut the pares in your desire shape.
7. Take a knife and make the cuts in rolled dough, either diamond shape or square shapes. You can cut the pares in your desire shape.
9. Take a knife and slide under the pares to loosen them, then pick some of the pare and very gently slip in into hot oil, with a fork separate them so that they do not stick together, then immediately with the help of pierced spatula start flickering hot oil over the top of the pare. After few minutes flip the pares to other side and fry. Keep the heat down and keep flipping the pares for 7 to 8 minutes or until pares become golden brown on both the sides.
Saturday, November 5, 2016
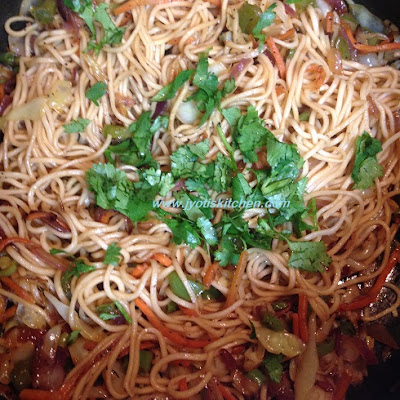
Veg Noodles
Vegetable noodles Recipe with step by step photo - Vegetable noodles is a very popular Indo Chinese dish. It is very easy to prepare and tastes delicious. I have added lot of vegetables to make it healthy. You can even use whole wheat noodles to make it even healthier. This version of Veg noodles is neither spicy nor hot as I have not added any chili sauce in it. The veggies can be of your choice.
Typically, while making any Indo Chinese dish, the heat should be high and the ingredients have to be tossed and stirred continuously. While making any stir fry dish at home, it’s better to use wide pan or wok. So that it’s easy to toss and stir.
Veg noodles goes well with Veg manchurian, Paneer manchurian, Chili paneer or Gobi Manchurian.
Preparation Time:
Cooking Time:
Serves: 2-3
Author: Jyoti Singh
Ingredients:
- Chinese noodles - 2 packets (150 grams)
- Garlic (Finely chopped) -2-3 cloves
- Ginger (Finely chopped) - 1/2 inch
- Onion (chopped) - 1 medium
- Cabbage (thinly sliced) - 1/2 cup
- Carrot (thinly sliced) - 1 medium size
- French beans (thinly sliced) – 8-10
- Capsicum (chopped) - 1 medium size
- Olive oil -2 + 1/2 tbsp
- Soya sauce - 2 tsp
- Vinegar - 1 tsp
- Tomato sauce- 1 tbsp
- Chili sauce - 1/2 tsp or as required
- Pepper powder - to taste
- Salt - to taste
- Coriander leaves (chopped) - 1/4 cup
Method:
1. Bring enough water to boil in a pan, adding 1/2 tsp of olive oil and 1/2 tsp of salt.
2. Add noodles to the boiling water. Stir it by using fork to prevent the noodles from sticking together and allow to cook the noodles till they are just cooked. It will take 2 to 3 minutes. Do not over cook the noodles.
3. Once the noodles are cooked, drain them in a colander.
4. Rinse the noodles under cold tap water to prevent it from sticking to each other.
5. Drizzle 1 tsp soy sauce and 1 tsp vinegar over it and toss the noodles well, so that they get coated evenly on the noodles. Keep it aside.
6. Heat oil in a large wok on medium heat. Add ginger and garlic, sauté for a min.
7. Add onions and keep stirring. Stir fry on high heat till onions become translucent.
8. Add beans, carrot and capsicum, mix well. Stir fry for about 5 to 6 minutes till the edges of the veggies start to slightly brown. (You can cut down on the stir frying time, if you prefer half cooked or more crunchy veggies)
9. Add in salt and pepper powder, mix well.
10. Add soy sauce, tomato sauce and chili sauce (I am not adding chili sauce here because making for my kid.) and mix well.
11. Add the cooked noodles and keep on tossing and stir frying the noodles till the veggies are mixed well with the noodles for about 2 minutes.
12. Switch off the flame. Add coriander leaves and mix well.
13. Serve hot veg noodles as it is or with Veg manchurian, Paneer manchurian, Chili paneer or Gobi Manchurian.
Vegetable noodles Recipe with step by step photo:
1. Bring enough water to boil in a pan, adding 1/2 tsp of olive oil and 1/2 tsp of salt.
2. Add noodles to the boiling water. Stir it by using fork to prevent the noodles from sticking together.3. Allow to cook the noodles till they are just cooked. It will take 2 to 3 minutes. Do not over cook the noodles.
4. Once the noodles are cooked, drain them in a colander.
5. Rinse the noodles under cold tap water to prevent it from sticking to each other.
6. Drizzle 1 tsp soy sauce over it.
7. Drizzle 1 tsp vinegar over it.
8. Toss the noodles well, so that they get coated evenly on the noodles. Keep it aside.
9. Heat oil in a large wok on medium heat.
10. Add ginger and garlic, sauté for a min.
11. Add onions and keep stirring. Stir fry on high heat till onions become translucent.12. Add beans, carrot and capsicum, mix well. Stir fry for about 5 to 6 minutes till the edges of the veggies start to slightly brown.
13. Add pepper powder, mix well.
14. Add in salt and mix well.
15. Add soy sauce, mix well.
16. Add tomato sauce and mix well.
17. Add the cooked noodles.
18. Keep on tossing and stir frying the noodles till the veggies are mixed well with the noodles for about 2 minutes.
19. Switch off the flame. Add coriander leaves and mix well.
20. Serve hot veg noodles as it is or with Veg manchurian, Paneer manchurian, Chili paneer or Gobi Manchurian.
Popular Tag: Breakfast, Fusion, Indo-Chinese, Kid-Friendly, Snacks
Subscribe to:
Posts (Atom)


