Thursday, September 29, 2016
Egg Fried Rice
Egg Fried Rice - Egg fried rice is delicious, healthy, simple, quick and easy recipe that you can make at home. It can be prepared by using freshly cooked rice or with leftover also. If you are using leftover refrigerated rice bring it to room temperature first. It is a complete meal on its own. It doesn't need any side dish, but can be accompanied with chili paneer, Gobi manchurian, vegetable manchurian, paneer manchurian or any other Indo-Chinese gravy based dish.
Eggs have high nutrients and a very good quality of protein. Adult and kids probably enjoy eating eggs and is among the most frequent food in the breakfast. The egg fried rice boosts a feeling of fullness. It is life-saver recipe when you have guests in your house with no prior information. Egg fried rice is perfect for Kid's lunch box.
Eggs have high nutrients and a very good quality of protein. Adult and kids probably enjoy eating eggs and is among the most frequent food in the breakfast. The egg fried rice boosts a feeling of fullness. It is life-saver recipe when you have guests in your house with no prior information. Egg fried rice is perfect for Kid's lunch box.
Preparation Time:
Cooking Time:
Serves: 3
Ingredients:
- Oil - 1 tbsp + 1 tbsp
- Eggs - 3
- Ginger (minced) - 1 tbsp
- Garlic (minced) - 1 tbsp
- Onions (finely chopped) - 1 medium size
- Green Chili (chopped) - 4
- Capsicum/Bell Pepper (finely chopped) - 1
- Carrot (chopped) - 1 medium
- Soy Sauce - 2 tbsp
- Vinegar - 1 tbsp
- Pepper Powder - 1 tsp
- Salt - to taste
- Spring Onion green (finely chopped) - 2 tbsp
- Coriander leaves (finely chopped) - 2 tbsp
- Basmati Rice - 1 cup
- Water - 1.5 cup
- Salt - 1/2 tsp
- Ghee/oil - 1/2 tsp
Method:
For Cooking Rice:
1. How to cook the Rice - See recipe here.
2. Invert the rice to a bowl or plate and fluff it up, let it cool completely.
For frying:
1. Heat oil in a wok on high heat. Add in ginger, green chilies and garlic. Sauté on high heat for 1 mins.
2. Add onion and fry till translucent.
3. Add capsicum, cabbage and carrot. Sauté on high flame till they are almost cooked. Add in salt, soy sauce, vinegar and pepper powder. Mix well.
4. Lower the flame to medium. Break the eggs to a bowl and add them into the pan.
5. Lightly scrambled them and cook till soft.
6. Add in cooked rice and toss well. Fry for 5 mins.
7. Add spring onions green and coriander leaves. Mix well.
8. Turn off the heat. Serve hot with chili paneer, vegetable manchurian, paneer manchurian or any other Indo-Chinese gravy based dish.
Popular Tag: Egg, Kid-Friendly, Kids lunch box recipe, Rice
Sunday, September 25, 2016
Veg Momo
Veg Momo Recipe with step by step photo - Veg Momos are traditional recipe of Tibet and Nepal. Nowadays, Veg Momos are very popular street food in India. Veg Momo is a steamed dumpling filled with a flavorful vegetables, served with a spicy red chutney or sauce. This is the perfect recipe for kids.
I don’t make momos often. Hence obviously, I am not an expert in shaping them. Excuse the shape and size of the momos :)
Shaping the Momos come through practice. So, when you are making Momos first time, try to make easy shape. Preparing Momos is quite lengthy and time taking too. But it's easy to make Momos at home. I am sharing simple, easy and quick way to make Momos at home.
Preparation Time:
Cooking Time:
Serves: 12 to 14 momos
Ingredients:
For the Dough:
- All purpose flour - 1 cup
- Oil - 1 tsp
- Salt - to taste
- Water - as needed to knead the flour
- Cabbage (finely chopped) - 1 cup
- Carrot (finely chopped) - 3/4 cup
- Onion (finely chopped) - 1 medium size
- Green chilies (finely chopped) - 1-2
- Garlic (finely chopped) - 2 cloves
- Ginger (finely chopped) - 1/2
- Soy sauce - 1 tsp
- Vinegar- 1 tsp
- Black pepper powder - 1/4 tsp
- Sugar - 1/4 tsp (optional)
- Salt - to taste
Method: Write Method/Instructions here
For the Dough:
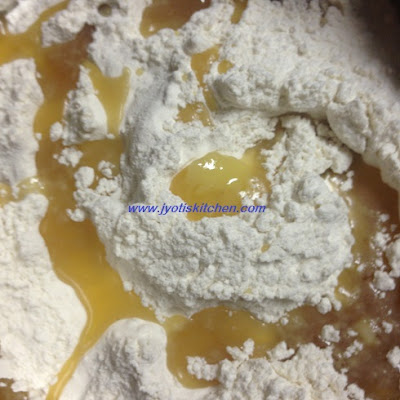
1. Take the all purpose flour/maida, salt and oil in a bowl and mix it well.
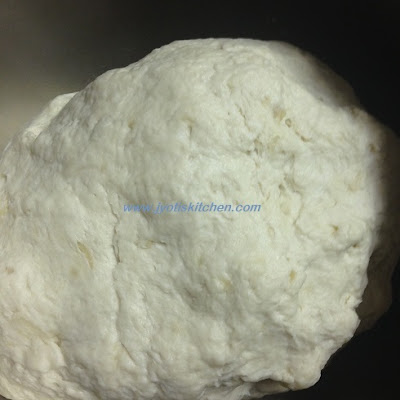
2. Slowly add water in it and knead to firm dough. Cover the dough and keep it aside for 30 minutes.
For Vegetable filling:
1. Heat oil in a wide pan and add the garlic, green chilies and ginger, Sauté for 30 seconds.
2. Add the chopped onions and sauté till they turn translucent.
3. Add the chopped cabbage and carrot and stir fry on medium-high heat till edges starts getting golden.
4. Add soy sauce, vinegar, black pepper powder, salt and sugar and mix well.
5. Continue to stir fry on high heat till the vegetables are cooked. Takes about 8 to 10 minutes on a medium-high flame.
6. Turn off the heat, add coriander leaves, mix well and allow to come to room temperature.
How to Proceed for Momos:
1. Knead the dough again for 2-3 mins and pinch out small lemon sized balls of the dough and dust with flour.
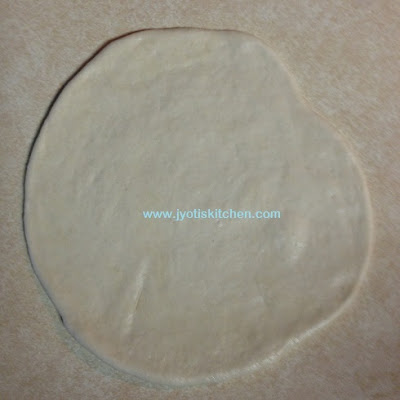
2. Roll out each ball into a 2 to 3 inch diameter circle. It should not be too thick or too thin in thickness. The edges have to be thin and center has to be thick.
3. Place a tablespoon of the prepared vegetable filling in the center of each rolled out circle. Do not overstuff as it will be difficult to form a neat pouch shape.
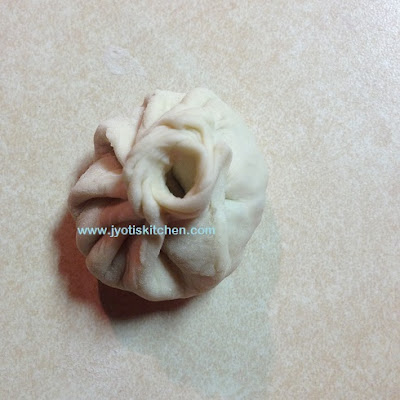
4. Lift one side of the edge and start pleating. Start folding and forming the pleats one by one. (Make pleat like Saree). Towards the end, join the pleats in the center.
5. Prepare all momos this way and keep them cover with a damp cloth to avoid drying till you are ready to steam them.
6. Grease the steamer pan with oil and arrange the momos in it, keeping space between them.
7. Heat water in a steamer or in an electric rice cooker or in a pressure cooker. Let the water come to a boil. (I used electric rice cooker)
8. Steam Momos in an electric cooker or a steamer pan for 5-6 minutes till the outer cover becomes shiny. (NOTE: Don’t overcook as then the outer cover becomes dense and chewy.)
9. Steaming time may vary upon the thickness of Momos cover. When you touch the momo then dough should not feel sticky and looks shiny that means Momos are done.
10. Serve vegetable momos hot with momos chutney, spicy schezwan sauce or tomato sauce. Momos should be eaten hot.
Veg Momo Recipe with step by step photo:
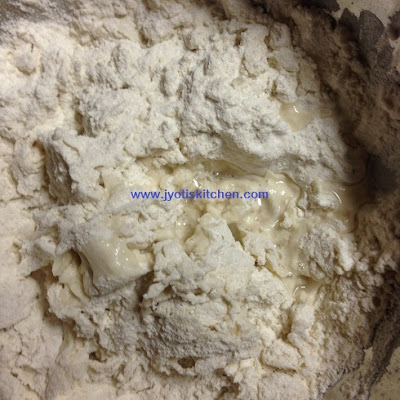
1. Take the all purpose flour/maida, salt and oil in a bowl and mix it well.
2. Slowly add water in it and knead to firm dough.
3. Dough is ready. Cover the dough and keep it aside for 30 minutes.
4. Heat oil in a wide pan and add the garlic, green chilies and ginger, Sauté for 30 seconds.
5. Add the chopped onions and sauté till they turn translucent.
6. Add the chopped cabbage and carrot and stir fry on medium-high heat till edges starts getting golden.
7. Add pepper powder.
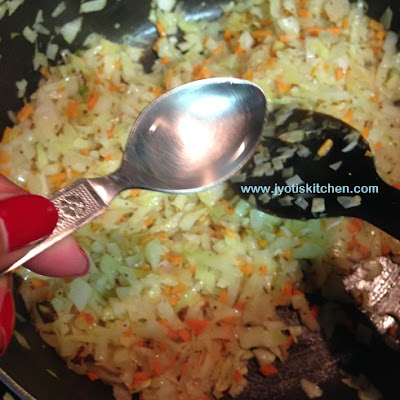
8. Add vinegar.
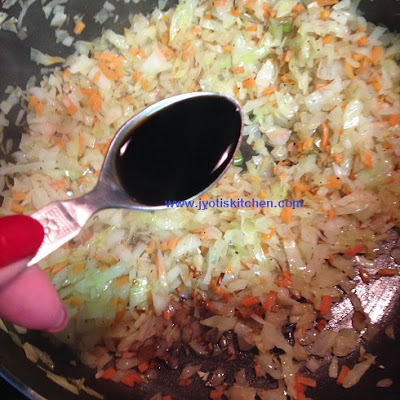
9. Add soy sauce.
10. Add salt.
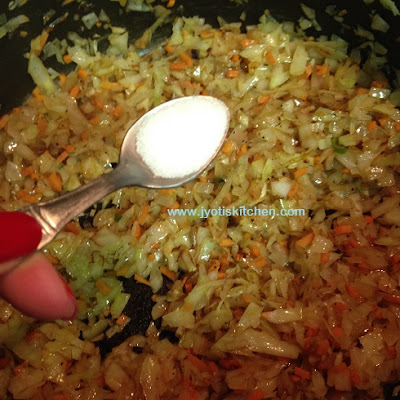
11. Add sugar. Mix well.
12. Continue to stir fry on high heat till the vegetables are cooked. Takes about 8 to 10 minutes on a medium-high flame. Turn off the heat, add coriander leaves, mix well and allow to come to room temperature.
13. Pinch out small lemon sized balls of the dough and dust with flour. Roll out each ball into a 2 to 3 inch diameter circle. It should not be too thick or too thin in thickness. The edges have to be thin and center has to be thick.
14. Place a tablespoon of the prepared vegetable filling in the center of each rolled out circle.
15. Lift one side of the edge and start pleating. Start folding and forming the pleats one by one.
16. Towards the end, join the pleats in the center. Prepare all momos this way and keep them cover with a damp cloth to avoid drying till you are ready to steam them.
17. Grease the steamer pan with oil and arrange the momos in it, keeping space between them. Steam Momos in an electric cooker or a steamer pan for 5-6 minutes till the outer cover becomes shiny. When you touch the momo then dough should not feel sticky and looks shiny that means Momos are done.
18. Serve vegetable momos hot with momos chutney, spicy schezwan sauce or tomato sauce.
Momos chutney/Red chili dipping sauce
Momos chutney or Red chili dipping sauce - Momos chutney served with Momos is so delicious and easy to make at home. There are so many variations based upon the region to make Momo chutney. I am sharing a version of momos chutney that requires blanching tomatoes and roasting garlic before blending to a smooth paste.
Preparation Time:
Cooking Time:
Serves: 4
Ingredients:
- Tomatoes – 2
- Garlic - 7- 8 medium cloves
- Red chilies - 3-4 or as per taste
- Soy sauce - 1/4 tsp (optional)
- Vinegar - 1 tsp
- Sugar - 1 tsp
- Oil – 1 1/2 tbsp
- Salt - to taste
Method:
1. In a pan boil 2 cups water. Place whole tomatoes and red chili in it and cook for 5 to 6 minutes.
2. When tomatoes skins are coming out then turn off the heat. Drain water and cool the tomato and red chilies
3. Heat 1/2 tbsp oil in a pan, add the garlic cloves and sauté for a min. Turn off heat and keep it aside.
4. Once the tomato and red chilies reach room temperature, peel the tomato and discard the skin. Blend the peeled tomato along with red chilies, roasted garlic, sugar, vinegar, soy sauce, and salt to a smooth paste. Add some water to make a smooth paste.
5. Heat a tbsp of oil in a pan, add the ground paste and cook on medium heat for 5 minutes, stirring constantly so that it does not burn.
6. Turn off heat, remove in a serving bowl and serve with Momos.
Monday, September 19, 2016
Tandoori Chicken
Tandoori Chicken - This mouthwatering delicious chicken is well known as Tandoori chicken or Murgh chicken. Murgh means chicken and tandoor is a clay oven, in which the spice and yogurt marinated chicken is grilled. The Indian classic Tandoori Chicken is actually very easy to make at home in the oven.
Preparation Time:
Marinating Time: 6 hours or Overnight
Cooking Time:
Serves: 4
Ingredients:
- Chicken - 8 pieces of chicken leg
- Olive oil - for Brushing on top
- Chat Masala - for Sprinkling on top
- Coriander leaves - for garnish
- Chilli Powder - 1 tbsp
- Salt - to taste
- Lemon Juice - 2 to 3 tbsp
- Thick Yogurt - 1 cup
- Chilli Powder - 1 tbsp
- Coriander Powder - 2 tbsp
- Cumin Powder - 2 tsp
- Black Pepper Powder - 1 tsp
- Garam masala powder - 1 tbsp
- Turmeric Powder - 1 tsp
- Red Food color- a pinch (optional)
- Ginger garlic paste - 1 tbsp
- Kasoori Methi Leaves - 1 tbsp
Method:
1. Add chilli powder, salt and lemon juice in a small bowl. Keep aside.
2. Take chicken and make deep slits on them. Add salt, chilli powder and lemon juice mixture in slits. First marination is done. Leave this aside for 30 mins.
3. In a bowl take yogurt, chilli powder, coriander powder, cumin powder, turmeric, black pepper powder, garam masala powder, ginger garlic paste, red food color, salt, kasoori methi leaves and mix well. Pour this over the marinated chicken and mix well.
4. Leave this to marinate for 6 hours or overnight in refrigerator.
5. Next day, remove it and let it come to room temp.
6. Preheat oven to 320 Degree F.
7. Now place the chicken over a foil lined baking tray and put it in oven for 15 mins, remove it and flip over, apply leftover marination over it if you have any and bake it for 15 more mins.
8. Now remove it from oven, apply olive oil all over it and bake it for 10 -15 more mins or until chicken is done from all sides.
9. Now remove it and set aside. Mean time, increase the oven temp to 350 degree F and set the mode to grill or broil.
10. Place the tray near to the grill and cook it for 5 mins till you see some black spots over the chicken.
11. Remove it from oven, give a final glaze with olive oil and sprinkle some chat masala over it and garnish with coriander leaves.
12. Serve hot with mint chutney or green chutney.
Popular Tag: Appetizer-Starter, Chicken, Non Vegetarian
Tuesday, September 13, 2016
Egg Dum Biryani
Egg Dum Biryani - Egg dum biryani is a traditional mughlai main course recipe of India. This recipe is light, mild and delicious. The rice grains were fluffy, cooked well and separate. An authentic egg biryani is always slow cooked on dum. This cooking on dum gives the biryani its uniqueness and originality.
Preparation Time:
Cooking Time:
Serves: 4
Ingredients:
For the rice:
- Basmati rice (soaked and drained) - 1 - 1/2 cups
- Oil - 1 tbsp
- Salt - to taste
- Cardamom - 2
- Cloves - 2
- Bay leave - 1
- Cinnamon - 1 inch
- Caraway seeds (shahi jeera) - 1/4 tsp
For the Egg Gravy or masala:
- Egg (hard boiled, peeled and cut into half) - 4
- Bay leaves - 1
- Green cardamom - 4
- Cloves - 2
- Caraway seeds (shahi jeera) - 1/2 tsp
- Cumin seeds - 1 tsp
- Onion (Thinly sliced)- 2 big
- Tomato (chopped) - 1 medium
- Ginger garlic paste - 1 tbsp
- Red chilli powder - 1 tbsp
- Turmeric powder - 1 tsp
- Green chillies (slit) - 4-5
- Ginger (thinly sliced) - 1/2 inch
- Biryani masala - 50 grams
- Yogurt (Curd) - 1/2 cup
- Oil - 2 tbsp
- Salt - to taste
- Mint leaves (chopped) - 4 tbsps
- Coriander leaves (chopped) - 2 tbsps
- Saffron (kesar) - a few strands
- Milk (warm) - 1/4 cup
For Garnish:
- Ghee (melted butter) - 4 tbsps
- Garam masala powder - 1 tsp
Method:
For the Egg Masala or Gravy:
1. Thinly slice one onion and fry them in oil to make the fried onions, set aside.
2. Heat oil in a pan; add cumin seeds, cardamom, cloves, bay leaf, cinnamon stick, except shahi jeera . Sauté for 30 seconds.
3. Add shahi jeera and sauté for few second.
4. Add ginger garlic paste and fry till the raw smell goes off.
5. Add one thinly sliced onion and fry till golden brown.
6. Add tomato, green chillies, ginger and fry till tomatoes are mushy.
7. Add turmeric, red chili powder, salt and biryani masala powder. Sauté for about 2 to 3 minutes.
8. Whisk yogurt with little water and add into this. Cover and simmer for 2 minutes.
9. Add the eggs carefully and saute till well coated with the masala.
10. Turn off the heat. set aside.
For the rice:
In a large pot, take 5 cups of water, add oil, salt, shahi jeera, cardamom, cloves, bay leaf, cinnamon stick and bring it to boil. Add rice and Cook on a medium flame till it is ¾ done. Drain off the excess water and set aside.
How to proceed:
1. In a small bowl take warm milk and add saffron strands. keep aside.
2. Take a biryani bowl or a deep wide pan. Add half of the cooked egg masala and spread it evenly all over the pan.
3. Transfer half of the prepared rice on it and spread it evenly. Spread half of fried onions on it, sprinkle half of the garam masala powder, half the mint leaves and coriander leaves and pour half of the saffron milk.
4. Repeat the same process again for rest of the egg masala and rice and arrange the layer.
5. Pour the ghee evenly over it and cover it with a lid or you can use a foil to cover it tightly.
6. Place this pan on a hot griddle/tawa and cook on low flame for 20 to 25 minutes.
7. Serve hot with raita.
Saturday, September 3, 2016
Sooji Gujiya
Sooji Gujiya Recipe with step by step photo - Gujiya is a deep fried pastry filled with khoya, sooji, coconut and nuts. But in this recipe sooji is more so I call it Sooji Gujiya. Gujiya is very popular in North India particularly in Bihar, Jharkhand, Uttar Pradesh, Madhya Pradesh and Rajasthan, especially during Teej, Holi and Diwali. In my home specially Gujiya made during Teej festival. Gujiya making is an art specially if we are sealing the edges by hand. Making Gujiya is not complicated it's just take little time. It's taste great.
Preparation Time:
Cooking Time:
Serves: 25
Ingredients:
For Crust:
- Maida/All purpose flour - 2 Cups
- Ghee or Oil - 4 tbsp
- Water - 1/3 cup or as required
For Filling:
- Sooji/Semolina - 1 Cup
- Mawa/Khoya (optional) - 3/4 Cup
- Powdered Sugar - 1 Cup or as per taste
- Cardamom Powder - 1/2 tsp
- Grated Dry Coconut - 1/2 Cup
- Raisins - 2 tbsp
- Cashew nuts (Chopped) - 4 tbsp
Also needed:
- Oil - To Deep Fry
- Maida - 1 tbsp
Method:
For Crust:
1. In a wide bowl take all purpose flour/maida, 4 tbsp oil and mix well, add water in small quantity and Knead the dough until the dough becomes soft and pliable.
2. Cover with a damp cloth and keep aside for 10 to 15 minutes.
Filling:
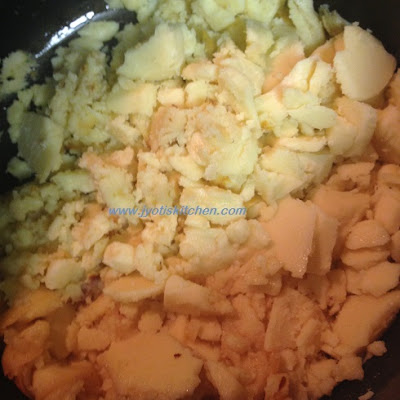
1. In a pan or kadai add khoya/mawa and cook in slow flame for 2-3 minutes or until its melts loosen up, switch off the flame, and keep aside.
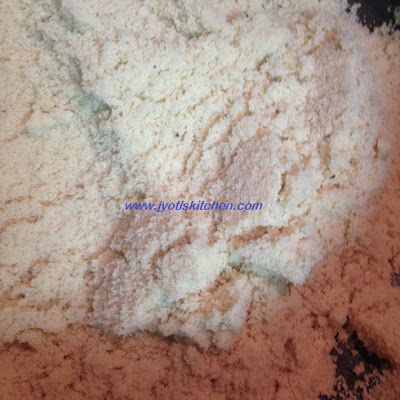
2. Heat a pan and add ghee to it and roast Sooji on slow flame till it changes color to light pink. Keep stirring so it doesn't get burnt.
3. Add cardamom powder into it, mix it well.
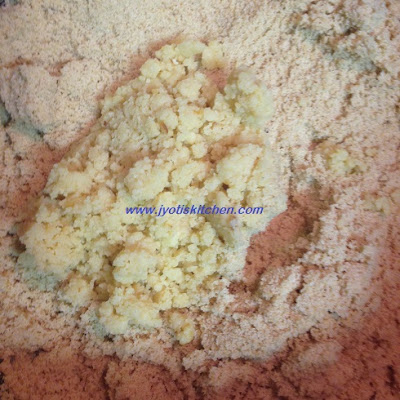
4. Add khoya/mawa and mix well khoya with sooji.
5. Add nuts into it. Mix well.
6. Turn off the heat. Transfer it in a plate or bowl to cool down.
7. When completely cooled add grated coconut, powdered sugar and mix well.
8. Filling is ready. Keep aside.
Making Gujiya (how to proceed):
1. Mix 2 tablespoons of water with 1 tablespoon of flour to make a paste. Set aside.
2. Knead the dough well again and make equal sized balls so as to make small poori.
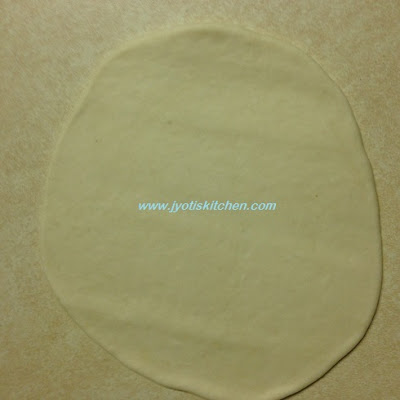
3. Take a ball and roll out thin poori of it.
4. Dip your finger in the flour paste and spread it around the edges of the rolled poori.
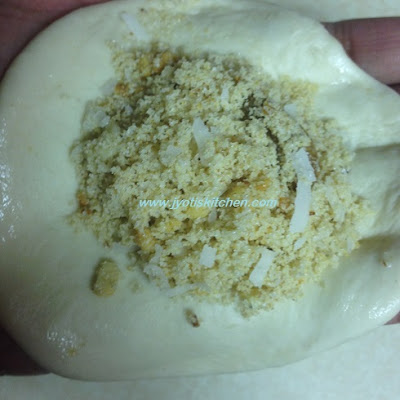
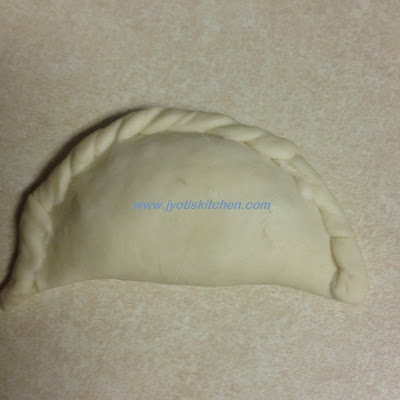
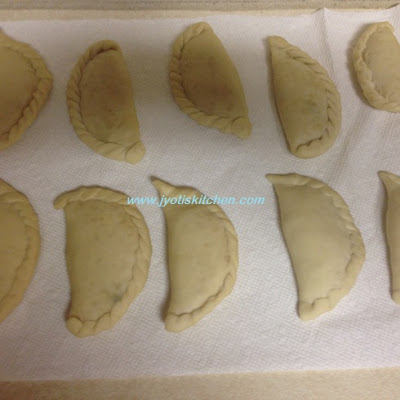
5. Take the rolled poori in your palm and put about 1-1/2 tablespoons of the filling mixture in the center (Sooji doesn't touch the ends of poori) and fold it into a semi-circle. Now press the edges together with your fingers. Press edges with a fork to seal and make impression or with hand pinch edges and seal it. Make sure the edges are completely sealed.
6. Repeat with other balls and stuffing.
7. Heat enough oil for deep frying on medium heat.
8. Place 2-3 gujiya at time and fry in medium to slow flame.
9. After gujhiyas are floating on top of the oil, turn them slowly. Fry until both sides golden brown, do turn 2-3 times gujiya to cook it well both sides. Lift them out of the oil with a slotted spoon.
10. Keep in kitchen tissue to drain excess oil.
11. Allow to cool them completely before storing in air tight container.
Sooji Gujiya Recipe with step by step photo:
1. In a wide bowl take all purpose flour/maida, 4 tbsp oil and mix well, add water in small quantity and Knead the dough until the dough becomes soft and pliable.
2. Cover with a damp cloth and keep aside for 10 to 15 minutes.
3. In a pan or kadai add khoya/mawa and cook in slow flame for 2-3 minutes or until its melts loosen up, switch off the flame, and keep aside.
4. Heat a pan and add ghee to it.
5. Roast Sooji on slow flame till it changes color to light pink. Keep stirring so it doesn't get burnt.
6. Add khoya/mawa and cardamom powder, mix well khoya with sooji.
7. Add nuts into it. Mix well.
8.Turn off the heat. Transfer it in a plate or bowl to cool down. When completely cooled add grated coconut.
9. Add powdered sugar and mix well.
10. Filling is ready. Keep aside.
11. Mix 2 tablespoons of water with 1 tablespoon of flour to make a paste. Set aside.
12. Knead the dough well again and make equal sized balls so as to make small poori.
13. Take a ball and roll out thin poori of it.
14. Dip your finger in the flour paste and spread it around the edges of the rolled poori. Take the rolled poori in your palm and put about 1-1/2 tablespoons of the filling mixture in the center.
15. Now press the edges together with your fingers.
16. Press edges with a fork to seal and make impression or with hand pinch edges and seal it.
17. Make sure the edges are completely sealed.
18. Repeat with other balls and stuffing.
19. Heat enough oil for deep frying on medium heat.
20. Place 2-3 gujiya at time and fry in medium to slow flame.
21. After gujhias are floating on top of the oil, turn them slowly. Fry until both sides golden brown, do turn 2-3 times gujiya to cook it well both sides.
22. Lift them out of the oil with a slotted spoon.
23. Keep in kitchen tissue to drain excess oil.
24. Serve.
Thursday, September 1, 2016
Besan Ladoo
Besan Ladoo Recipe with step by step photo - Besan Ladoo is one of the popular sweet in India. It is usually made during festive time like Ganesh chaturthi, Diwali or Holi.. Besan Ladoo is easy and healthy sweet which is made all over India. To make these Besan Ladoo, gram (chickpea) flour is roasted in ghee until aromatic and turns to a light brown color. When it starts releasing the ghee then turn off the heat. The flour is then cooled down a bit, powdered sugar and nuts are added, the mixture is then shaped to balls. To make them healthier, you can add dry fruits like almonds, raisins, cashews or pistachios. I am adding raisins, almond and cashews. You can make them in bulk and store in air tight container for 10 to 15 days. These ladoos are loved by most kids.
Preparation Time:
Cooking Time:
Serves: 8
Ingredients:
- Ghee - 100 grams
- Besan (gram flour) - 250 grams
- Sugar (powder) - 250 grams
- Cardamom powder - 1 tsp
- Raisins - 2 tbsp
- Almond – 2 tbsp
- Cashews – 10-12
Method:
1. Make the powder of cashews and almond. Keep it aside.
2. Heat ghee in a heavy bottomed pan.
3. Add besan and roast till brown in color on low-medium heat stirring continuously. It will take around 20 minutes.
4. Add cardamom powder and mix well.
5. Add almond-cashews powder and raisins, mix it well.
6. Turn off the heat and when flour is cooled down a bit, add powdered sugar, mix well.
7. Let the besan mixture become cool to warm temperature and then shape into medium sized besan ladoos.
8. Leave the ladoos on a plate to cool to room temperature before putting into airtight container. These ladoos can be stored for 2 to 3 weeks.
Besan Ladoo Recipe with step by step photo:
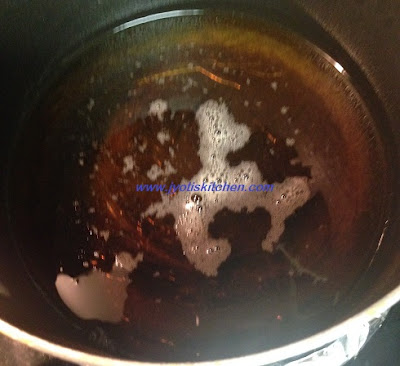
1. Heat ghee in a heavy bottomed pan.
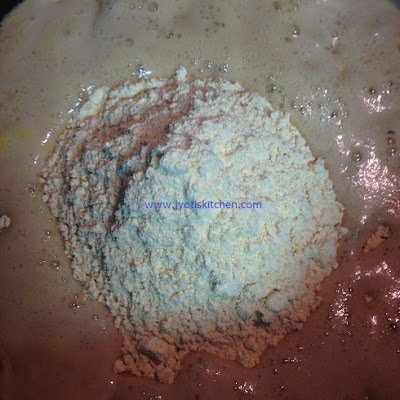
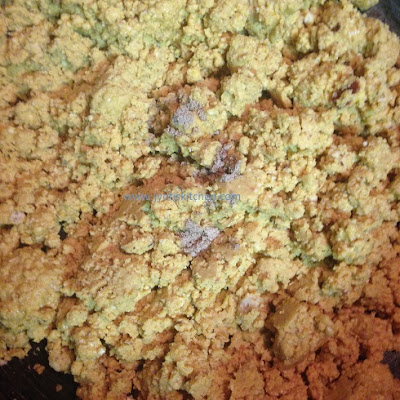
2. Add besan and roast till brown in color on low-medium heat stirring continuously. It will take around 20 minutes.
3. Add cardamom powder and mix well.
4. Add almond-cashews powder and raisins, mix it well.
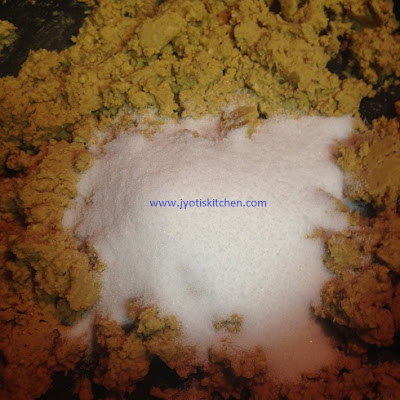
5.Turn off the heat and when flour is cooled down a bit, add powdered sugar, mix well.
6. Let the besan mixture become cool to warm temperature.
7. Then shape into medium sized besan ladoos.
8. Leave the ladoos on a plate to cool to room temperature before putting into airtight container.
Subscribe to:
Posts (Atom)


